This news is few days old already (was lazy to post on the day my rss bandit notified me)
r7 writes,
"Internetnews is reporting on Sun's introduction of JavaFX at JavaOne today. Looks like a combination Applet, Flash, Javascript, and AJAX with a friendly programming interface. Does this really spell the end of AJAX? I sincerely hope so. Nothing built on Javascript will ever achieve the security, cross-platform reliability, and programmatic friendliness that Web 2.0 needs. Proprietary solutions and vendor lock-in are also dead ends. JavaFX has the potential to satisfy this opportunity even better than did Java over a decade ago. Along with AJAX, let's hope JavaFX also puts paid to Microsoft's viral Active-X and JScript, and, more importantly, that it really is a web scripting language that developers can grok." (Ref: SlashDot)
Read More:
http://www.internetnews.com/dev-news/article.php/3676226
Friday, 11 May 2007
Thursday, 10 May 2007
Tablature Editor - TuxGuitar
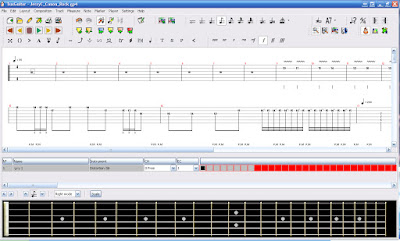
TuxGuitar is an open source software program written in Java. It is a tablature editor, score writer and player targeted at guitarists (Ref: wiki).
I don't want explain much on this program since this program is an open-source alternative (still need to improve!!!) to Guitar Pro. I think the main difference is Guitar Pro output sound is based on midi library, but TuxGuitar is taken from Java soundbank.
TuxGuitar Functions:
Steps:
1. Download TuxGuitar
- choose the installer base on your operating system
2. Download Java SoundBank
- choose the deluxe one
3. Install TuxGuitar
- after installing, launch the program and go to the program Settings->Configure TuxGuitar
I don't want explain much on this program since this program is an open-source alternative (still need to improve!!!) to Guitar Pro. I think the main difference is Guitar Pro output sound is based on midi library, but TuxGuitar is taken from Java soundbank.
TuxGuitar Functions:
- Tablature editor
- Score Viewer
- Multitrack display
- Autoscroll while playing
- Note duration management
- Various effects (bend, slide, vibrato, hammer-on/pull-off)
- Support for triplets (5,6,7,9,10,11,12)
- Repeat open and close
- Time signature management
- Tempo management
- Imports midi, tg, ptb, gp3, gp4, gp5 files
- Exports midi, ascii, gp3, gp4
Steps:
1. Download TuxGuitar
- choose the installer base on your operating system
2. Download Java SoundBank
- choose the deluxe one
3. Install TuxGuitar
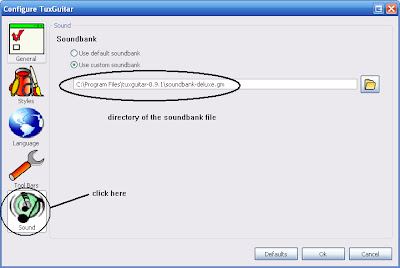
- after installing, launch the program and go to the program Settings->Configure TuxGuitar
- then go to Sound as shown in the screenshot below and target the directory's path to the java soundbank file.
4. At this stage, the program is almost configured, and you need is a file sample to play. Download CanonRock by JerryC (or can google any supported files to play) and try to play it.
Ok, happy practising guitar!!!
4. At this stage, the program is almost configured, and you need is a file sample to play. Download CanonRock by JerryC (or can google any supported files to play) and try to play it.
Ok, happy practising guitar!!!
Saturday, 5 May 2007
Virtual Machine - VirtualBox
Ever thinking of using different operating systems (OS) that you have never tried before? Maybe using linux distro (e.g. ubuntu, debian), windows (e.g. win2000, vista), or even mac OS, and so on. If you only have one desktop/laptop, I think you might thinking twice before experimenting with those OS because you need to reformat your hard disk, backup necessary files and you might face few technical difficulties during the OS installation.
Here is the solution, get a virtual machine!! A virtual machine is software that creates a virtualized environment between the computer platform and its operating system, so that the end user can operate software on an abstract machine (Ref: Wiki).
One of Virtual Machine softwares is called VirtualBox. Ok, lemme tell you how to use this software. I assume you know how OS installation work, but if not... experiment it since VM won't do any harmful (I guess so) .. because it's all virtual!!!
Here are the steps
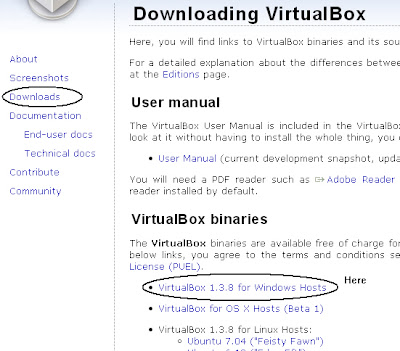
1. Download the software
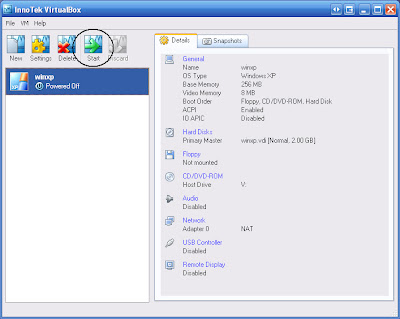
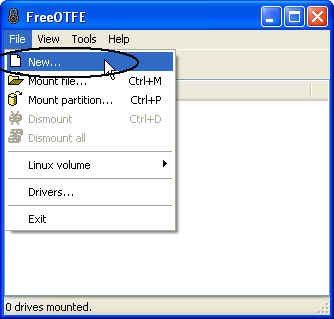
2. Install it using the wizard provided (should be easy). After the installation, run the program. Click "New" as shown in the diagram below.

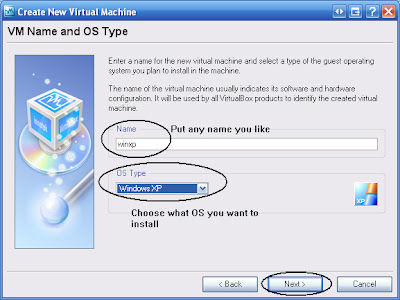
3. Click Next, then you'll see the window as below. I chose to install windows xp. It doesn't matter whether it's home edition or professional series.
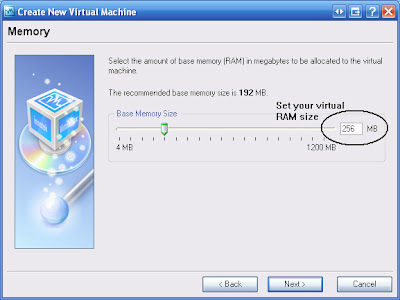
4. Choose the Virtual RAM size. My physical RAM is 1GB and I chose 256MB RAM for my virtual machine RAM (1/4 of the physical one). I don't really recommend to have VM RAM size greater than the host machine.
5. Create VM hard disk.

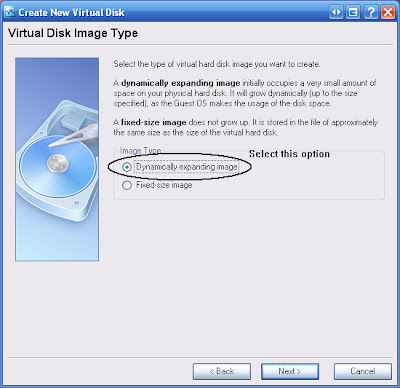
6. Choose Dynamic size hard disk (since I like it)
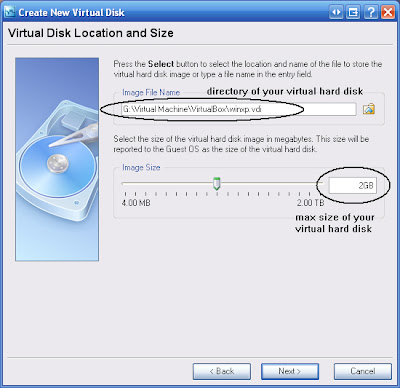
7. Choose the directory you want to store the image file, and the maximum size you want. 2GB is enough for this experiment.
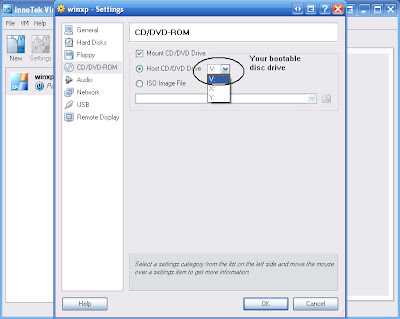
8. After the above steps finish, you'll be taken to the main window again. Choose your CD/DVD ROM where you boot the OS.
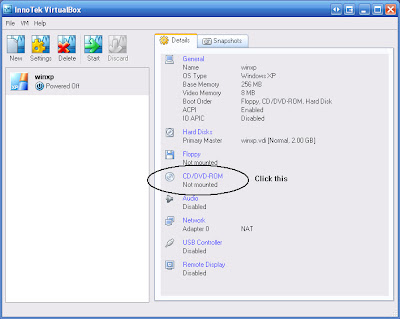
9. I chose mine, V
10. Start the VM machine
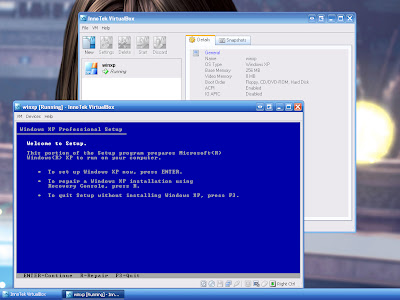
11. This image down here should be look familiar to some of you. I was running windows XP on my laptop, and was running windows XP on my Virtual Machine as well... quite a boring experiment.
Conclusion,
Virtual Machine allows you to run OS (guest) inside an OS (host). So before migrating to new OS like Vista (yeah it's not open-source OS), you can try it safely in Virtual Machine!!! Until then... maybe I like to share to you on how to run Mac OSX inside Windows. Bah.
(p/s: never believe what ppl say until you try it urself. Reading without trying is useless.)
Here is the solution, get a virtual machine!! A virtual machine is software that creates a virtualized environment between the computer platform and its operating system, so that the end user can operate software on an abstract machine (Ref: Wiki).
One of Virtual Machine softwares is called VirtualBox. Ok, lemme tell you how to use this software. I assume you know how OS installation work, but if not... experiment it since VM won't do any harmful (I guess so) .. because it's all virtual!!!
Here are the steps
1. Download the software
2. Install it using the wizard provided (should be easy). After the installation, run the program. Click "New" as shown in the diagram below.
3. Click Next, then you'll see the window as below. I chose to install windows xp. It doesn't matter whether it's home edition or professional series.
4. Choose the Virtual RAM size. My physical RAM is 1GB and I chose 256MB RAM for my virtual machine RAM (1/4 of the physical one). I don't really recommend to have VM RAM size greater than the host machine.
5. Create VM hard disk.
6. Choose Dynamic size hard disk (since I like it)
7. Choose the directory you want to store the image file, and the maximum size you want. 2GB is enough for this experiment.
8. After the above steps finish, you'll be taken to the main window again. Choose your CD/DVD ROM where you boot the OS.
9. I chose mine, V
10. Start the VM machine
11. This image down here should be look familiar to some of you. I was running windows XP on my laptop, and was running windows XP on my Virtual Machine as well... quite a boring experiment.
Conclusion,
Virtual Machine allows you to run OS (guest) inside an OS (host). So before migrating to new OS like Vista (yeah it's not open-source OS), you can try it safely in Virtual Machine!!! Until then... maybe I like to share to you on how to run Mac OSX inside Windows. Bah.
(p/s: never believe what ppl say until you try it urself. Reading without trying is useless.)
Tuesday, 24 April 2007
Hard Disk Encryption - FreeOTFE
Hard disk encryption is a way to protect data stored on a computer disk. Our operating system (OS) does provide access restrictions to protect data but unfortunately it can easily be by-passed e.g. when the OS is not active, then the data might be read directly from the hardware. I'm sure few of you ever use folder lock, or maybe software that allow to hide important stuffs from other people to see but that approach is not good enough.
I like to share an open-source software called FreeOTFE. This software use "on-the-fly" disk encryption (OTFE) technique. It creates "virtual disks" - anything written to which is automatically encrypted before being stored on the computer's hard drive or USB drive. Numerous encryption (including AES, Blowfish, Twofish, Serpent, etc) and hash algorithms (SHA-512, Tiger, Whirlpool, MD5, etc) are supported, with a modular architecture that allows 3rd parties to implement additional algorithms if required.
The program operates under both PC (MS Windows 2000/XP) and PDA (Windows Mobile 2003/2005) platforms. In case of Linux, please read the manual on the site. (p/s: i'm windows user and only run linux on virtual machine or live cd only). Note: never try this software if your are not so sure what your are doing.
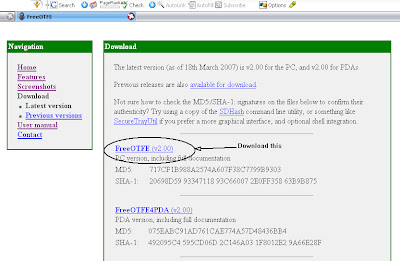
Download the software here, http://www.freeotfe.org/download.html
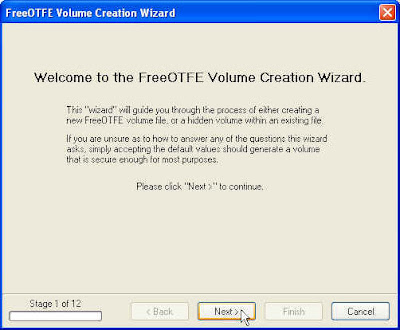
Installation
1. Extract the zip file
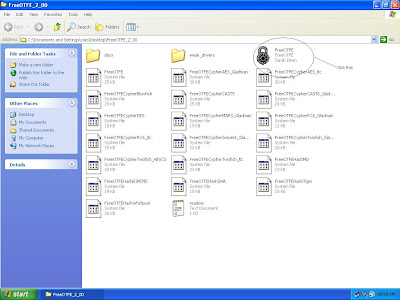
2.
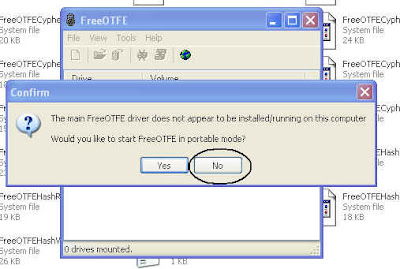
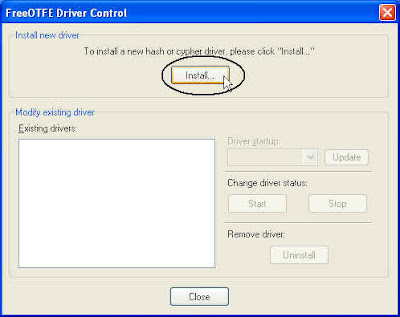
3. Install the drivers
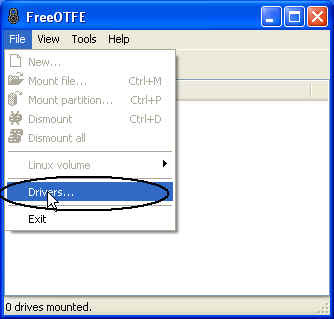
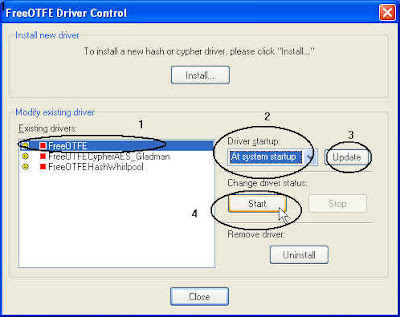
4. First install FreeOTFE driver
5.

6.
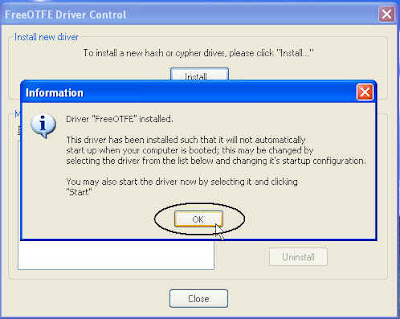
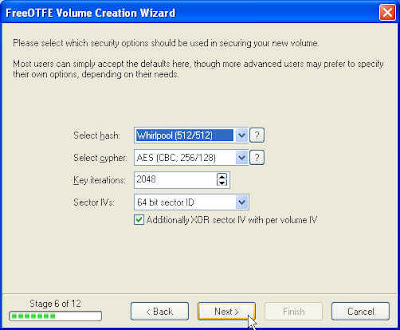
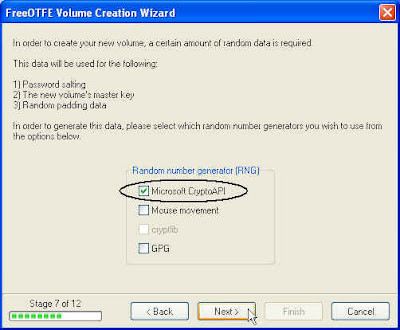
7. After installing the FreeOTFE driver, then install the cypher and the hash. In this example, I'm using AES_Gladman cypher and whirlpool hash.
Configuration
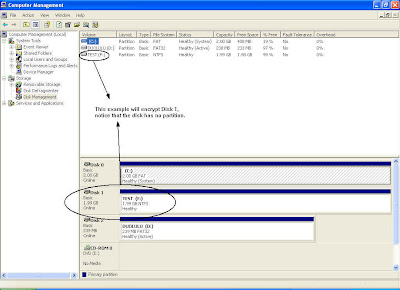
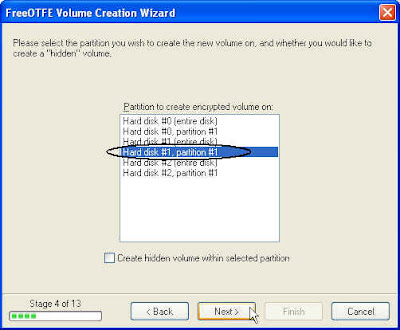
Little knowledge on Hard Disk management is required here such as the physical hard disk and its partition. The screenshot shown below is taken from my virtual machine (that is why the disk space is very low). Go to start-> control panel -> administrative tools -> computer management -> disk management.
Disk 0 - primary hdd where the OS is running
Disk 1 - second hdd
Disk 2 - third hdd
I'm going to encrypt Disk 1, notice that there is only a single partition on that hdd. The hdd does not necessary to be empty, formatted or not. For this example, Disk 1 is not empty and has few files in it, and it uses NTFS file system.
8.
9. Now I start to configure a drive, and try to encrypt it.
10.
11.

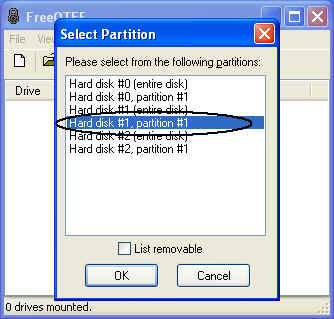
12. Select the partition as identified in step 8.
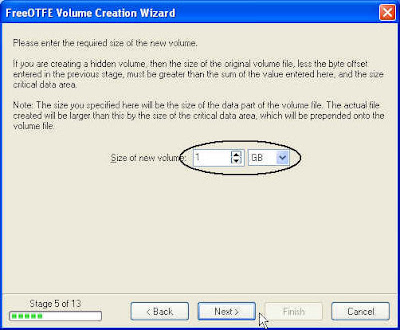
13. Make sure the size selected is lower than the physical partition. My Hard Disk 1 partition is 2GB and the encrypted volume is 1GB.
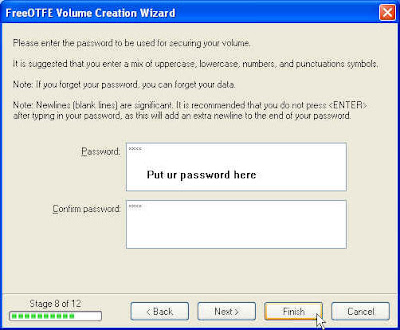
14. Just follow it.
15.
16.
Mount the Encrypted Hdd
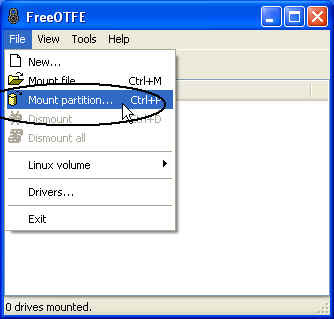
After the drive is encrypted, then it needs to be mounted in order to use it.
17.
18.
19.
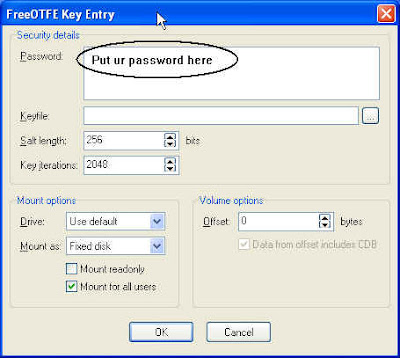
20.
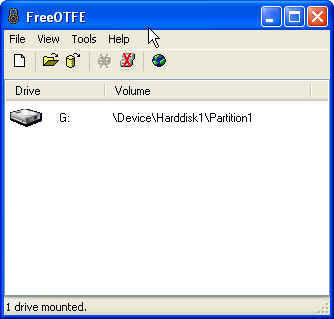
In My Computer, another disk will appear.. that disk is encrypted. Ok.. bah.
I like to share an open-source software called FreeOTFE. This software use "on-the-fly" disk encryption (OTFE) technique. It creates "virtual disks" - anything written to which is automatically encrypted before being stored on the computer's hard drive or USB drive. Numerous encryption (including AES, Blowfish, Twofish, Serpent, etc) and hash algorithms (SHA-512, Tiger, Whirlpool, MD5, etc) are supported, with a modular architecture that allows 3rd parties to implement additional algorithms if required.
The program operates under both PC (MS Windows 2000/XP) and PDA (Windows Mobile 2003/2005) platforms. In case of Linux, please read the manual on the site. (p/s: i'm windows user and only run linux on virtual machine or live cd only). Note: never try this software if your are not so sure what your are doing.
Download the software here, http://www.freeotfe.org/download.html
Installation
1. Extract the zip file
2.
3. Install the drivers
4. First install FreeOTFE driver
5.
6.
7. After installing the FreeOTFE driver, then install the cypher and the hash. In this example, I'm using AES_Gladman cypher and whirlpool hash.
Configuration
Little knowledge on Hard Disk management is required here such as the physical hard disk and its partition. The screenshot shown below is taken from my virtual machine (that is why the disk space is very low). Go to start-> control panel -> administrative tools -> computer management -> disk management.
Disk 0 - primary hdd where the OS is running
Disk 1 - second hdd
Disk 2 - third hdd
I'm going to encrypt Disk 1, notice that there is only a single partition on that hdd. The hdd does not necessary to be empty, formatted or not. For this example, Disk 1 is not empty and has few files in it, and it uses NTFS file system.
8.
9. Now I start to configure a drive, and try to encrypt it.
10.
11.
12. Select the partition as identified in step 8.
13. Make sure the size selected is lower than the physical partition. My Hard Disk 1 partition is 2GB and the encrypted volume is 1GB.
14. Just follow it.
15.
16.
Mount the Encrypted Hdd
After the drive is encrypted, then it needs to be mounted in order to use it.
17.
18.
19.
20.
In My Computer, another disk will appear.. that disk is encrypted. Ok.. bah.
Subscribe to:
Posts (Atom)
